Saturday, July 19, 2014

ပံုေတြကို္ ျပဳ႕ျပင္ရာမွာ အသံုးဝင္တဲ့ PhotoScape 3.6.5 ေနာက္ဆံုး update ႏွင့္ အသံုးျပဳ႕နည္း

  27 ရက္ေန႔ကထြက္သြားတဲ့ update ေလးပါ ။

က်ေနာ္ လိုပဲ Photoshop မသံုးတက္တဲ့ သူငယ္ခ်င္းေတြအတြက္ အရမ္းအဆင္ေျပပါတယ္

ဓါတ္ပံုျဖတ္ညွပ္ ကပ္၊နာမည္ေရး စာေရး၊ Logo ဆြဲ ၊ ေမြးေန႔ဖိတ္စာေတြ ေလာက္ကေတာ့

ေကာင္းေကာင္းေလးဆြဲ လို႔ရတယ္။ အသံုးလိုမယ္ ဆိုေအာက္မွာဆြဲသြားလိုက္ပါ ခင္ဗ်ာ


ေဒါင္းျပီးတာနဲ႕  အသုံးျပဳလို႕ရမွာ ျဖစ္ပါတယ္.. အသုံးျပဳနည္းကုိလည္း  ကြ်န္ေတာ္ တတ္နိဳင္သေလာက္
ရွင္းျပလိုက္ပါ့မယ္... လြယ္ကူတာမို႕ ကလိရင္းးတတ္မွာ ေသခ်ာပါတယ္ဗ်ာ... အသင့္တင့္ေလာက္ေတာ့
ေျပာျပလုိက္ပါတယ္ေနာ္...ကဲ စမယ္... ေဆာ့၀ဲလ္ကို ဖြင့္လိုက္ပါေနာ္.. ေအာက္ကပုံေပါ့

 သည္လိုက်လာမွာ ျဖစ္ပါတယ္... အေပၚက ကင္မရာ ပုံေလးကိုကလစ္ျပီး စၾကမယ္ေနာ္..ကလစ္လုိက္ပါ
သည္လိုျဖစ္လာမယ္... သည္မွာ ရွင္းစရာေတြ မ်ားးေနမယ္... ပုံေတြ မ်ားေနမွာ မို႕  တခုခ်င္းးသည္ပုံေလး
ကိုအဓိက  နမူနာထား ရွင္းျပလိုက္မယ္ေနာ္....
(၁)  သည္လိုက်လာတာနဲ႕  ဘယ္ဘက္က ကြန္ပ်ဴတာ ဖိုင္ေတြထဲက ပုံရွိတဲ့ ေနရာကိုသြားလုိက္ပါ။
(၂)  အဲမွာ ရွိေနတဲ့ ပု့ေတြကို သဴ႕ေအာက္ကေန ပုံေလးေတြ ေပၚေနမွာ ျဖစ္ပါတယ္... ေရြးခ်ယ္လုိက္ပါ။
(၃)  ပုံေရြးျပီၤး ေရာက္ေနတာနဲ႕  စၾကမယ္ေနာ္... တခုခ်င္းးစလိုက္မယ္... လက္ေတြ႕ လုပ္ရင္းစမ္းသတ္ပါ။
(၄)  အေရးၾကီးးတာကေတာ့ ပုံကို စာေရးတာ ျပဳျပင္ ေပါင္းစပ္တာေတြအတြက္ Object ကိုကလစ္ရမယ္။

  (i) ပုံေပၚစာေရးဖို႕အတြက္   T  ဆိုတာေလးကိုကလစ္ရပါမယ္။
  (ii)  ပုံေပၚကို ေနာက္ထပ္ ပုံေတြ ေပါင္းစပ္မယ္ ထပ္ထည့္မယ္ဆို  T ရဲ႕အေပၚေထာင့္က photo ဆိုတာ
        ေလးကိုကလစ္လုိက္ပါ ကြ်န္ပ်ဴတာဖိုင္က်မယ္  လိုရာပုံ ထပ္ထည့္မယ္...ေပါင္းစပ္မယ္ေပါ့။
  (iii)  Home  ဆိုတာကေတာ့ ပုံျပီးးတာနဲ႕ ေဘာင္ခတ္လို႕ရတဲ့ ေနရာ တစ္ခု ဆိုပါေတာ့ေနာ္..တျခားးေတြလည္းလုပ္လို႕ရပါတယ္.. စမ္းၾကည့္ပါ။
(iv) Crop  ဆိုတာက ပုံေတြကို လိုအပ္တဲ့ ေနရာကေန ျဖတ္ေတာက္ယူတဲ့ အပိုင္းေလးပါ။
(v )  Tools  ဆိုတာကလည္း လုပ္စရာေတြ မ်ားစြာ ရွိပါတယ္...
( vi)  ေအာက္က ၾကယ္ပုံေတြ ေလးေထာင့္ကြက္ေတြ  အ၀ိုင္းေလးေတြကေတာ့  မိမိလိုအပ္သလို အသုံးျပဳ
       နိဳင္ပါတယ္... ဥပမာ ကြ်န္ေတာ္ ပုံေတြေပၚ အနီကြက္ေလးေတြ မွ်ားေလးေတြ ျပထာ အဲထဲကပါ။
ကဲဗ်ာ သည္လိုဆို လုပ္ရင္းးတတ္မွာေသျခာပါတယ္... လုပ္ေဆာင္ခ်က္  မွားလို႕ ျပန္ဖ်က္မယ္ဆိုရင္
ညာဘက္ ေအာက္ေထာင့္မွာ  Undo ဆိုတာ ကလစ္တာနဲ႕ သူ႕ဘာသာ ပ်က္ပါတယ္...
ေဆ့ေတာ့မယ္ဆိုတာနဲ႕ အဲေအာက္က  Save ေပါ့ဗ်ာ... ဒါဆို ဇယားေလးက်လာမယ္..
 သည္လိုေပါ့ အဲခါမွာ ေအာက္က  Save As ဆိုတာကလစ္ျပီး မိမိတို႕ လိုအပ္ေသာေနရာ ကြ်န္ပ်ဴတာ ဖိုင္ထဲမွာ ေဆ့ျပီးသိမ္းထားနိဳင္ပါျပီၤ.....


ကိုလတ္(ကြ်ဲဆင္း)


ေဒါင္းနည္းမသိခဲ့ပါက { ဒီမွာ } သြားလိုက္ပါ

Windows 9 Professional (New Window Eng/x64/May2014)


On This OS System Included More Apps, Themes, New wallpaper and Much More,..

Software :
- Adobe Reader 11.4
- Adobe Flash Player 12.0.235
- Adobe Flash Player ActiveX 12
- Aimp Player 3.55
- Autorun Virus Remover v3.3
- Boot Screen Win9 By DiLshad Sys
- Bit Torrent 7.8.2 Build 30417
- CCleaner Professional 4.08.4428
- CPU-Z 1.68
- DirectX32
- FileZilla FileZilla 3.8.0
- Firefox 28 Final
- Glary Utilities 4
- GOM Player 2.2.57.5189
- Hotspot Shield 3.37
- Internet Explorer 11 Final X64
- Internet Download Manager 6.12 Final
- Java Runtime Environment 1.7.0.45
- K-Lite Codec Pack 10.15 (Full)
- .NET Framework Version AIO
- Notepad++ 6.5
- Microsoft Silverlight 5.1.10411.0 Final x64
- Skype 6.11.0.102
- Team Viewer 9
- Ultra ISO 9.8.1
- USB Disk Security 6.2.0.432
- USB Safely Remove 5.2 Final
- VLC Media Player 2.1.3
- Visual C++ 2005 Redis
- Visual C++ 2005 SP1_Redis
- Visual C++ 2008 Redis
- Visual C++ 2008 SP1 Redis
- Visual C++ 2010 Redis
- Visual C++ 2012 Redis
- Winrar 5.0

Gadgets
- 10

Themes
- 12 New Themes

Whats' New??
- Boot Win 9 Edition
- New Eye catching themes
- New icon sets
- New Sound schemes
- New Registry settings
- Hang time ratio improved
- Added best shortcut styles
- Improved application interface
- Added RUN on start menu
- Add change theme
- Add change wallpaper
- Add desktop icon settings
- Advanced user accounting
- Clear type view
- Copy to Move to on right click
- Disable Autorun Drive
- Disable UAC
- Disable Tool Tips
- Disable Hibernate
- Don't mark new applications
- On Right Click Freeware Sys
- Enable AVALON effects
- Enable Clear Type Tuning
- Enable DVD in media player
- Enable Glass Effect(WDM) without graphics card
- Enable MP3 Encoding on right click
- Enable slow motion windows effects
- Enable status bar in notepad
- Get rid of windows mail splash
- Give your self permission to modify all
- Grant full admin control
- DiLshad Sys Site direct link from right click (Firefox needed)
- Removed Action center Icon
- Windows speed tweaking
- Wait to kill service - 2000
- Low level hooks time out - 1000
- Hang application time out - 1000
- Menu show delay - 0
- No low disk space warning
- Process Schedule 1st Program
- Mouse Speed Increased
- Hang Ratio Decreased
- Fast Shut Down And Login
- Down Power After Shut Down
- Touch Screen Feature Added
- Grant Admin control on Right Click
- Add Admin Tools on Desktop Context Menu
- Add manage on Desktop Context Menu
- Add Move to Folder on Desktop Context Menu
- Add Copy To Folder on Desktop Context Menu
- Add Task Manager on Desktop Context Menu
- Add Take Ownship on Desktop Context Menu
- Add Register and Unregister to .dll OCX Context Menu
- 500ms Delay Aero
- Larger Taskbar Previews
- Removed Action center icon
- small Taskbar Icon
- Removed mail Splash
- Detailed Shut Down And Login
>- Blocked Negative DNS Entery
- turn Off System Beep
- Turn off low Disk


Pre-activate လုပ္ထားတဲ့ Windows 9 Pro ကို ေဒါင္းယူဖို႔ ေအာက္မွာ လင့္ခ္ ၂ ခုေပးထားပါတယ္... အဆင္ေျပတဲ့ ေနရာကေန ေဒါင္းယူပါ... ဖိုလ္ဆိုဒ္ကေတာ့ 5G ေက်ာ္ပါတယ္...  Download Links ေတြ အားလုံး Resume ရပါတယ္...

File-Rio ကေန ေဒါင္းယူရန္
အေပၚက လင့္ခ္ကိုနွိပ္ၿပီးတာနဲ႔ ေဒါင္းလုပ္စာမ်က္ႏွာ ေပၚလာပါမယ္... ၿပီးရင္ ေအာက္ကို Scroll Down နဲ႔ ဆင္းသြားလိုက္ပါ... ေအာက္ကပုံမွာ ျပထားတဲ့ ေနရာကို ေတြ႔ပါမယ္... ၀ိုင္းျပထားတဲ့ေနရာ ကေန ေဒါင္းယူႏိုင္ပါၿပီ...


1fichier ကေန ေဒါင္းယူရန္
အေပၚက လင့္ခ္ကိုနွိပ္ၿပီးတာနဲ႔ ေဒါင္းလုပ္စာမ်က္ႏွာ ေပၚလာပါမယ္... ၿပီးရင္ ေအာက္ကို Scroll Down နဲ႔ ဆင္းသြားလိုက္ပါ... ေအာက္ကပုံမွာ ျပထားတဲ့ ေနရာကို ေတြ႔ပါမယ္... မွ်ားျပထားထားတဲ့ေနရာ ကေန ေဒါင္းယူႏိုင္ပါၿပီ...


Good Luck... ကိုမ်ဳိး
IDM နဲ႔ ေဒါင္းလို႔ရေနပါတယ္... Comment မွာ မရဘူးေျပာေနလို႔ ပံုေလးေတြတင္ေပးလိုက္ပါတယ္..


မူရင္းလင့္

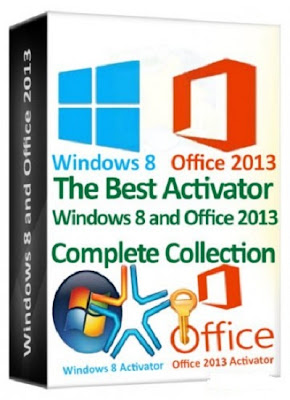
KMSAuto v2.25 Final Windows and Office Activator

https://blogger.googleusercontent.com/img/b/R29vZ2xl/AVvXsEifbrrJwggUCpId8w32eriXjtAbA4CBUSZw8Jz6sgY59KNRBdZFDNpnQytX8NYL5FUE4SdRUXH7bw7P2QnqLpCOvEUFxsSXJMDoEQ-0TSPeCeAQCihdedEWaV27ReElbshPUCSZzmUSFX_E/s320/The+Best+Activator+Windows+8+and+Office+2013+Complete+Collection+Pack.jpg
အခုတင္ေပးလိုက္တဲ႕ Window & Office Activator ေလးကိုေတာ့ကၽြန္ေတာ္ ကိုယ္တိုင္ေတာ္ေတာ္ေလး သေဘာက်တဲ႕ Activator ျဖစ္ပါတယ္ဗ်ာ။ ဒီေကာင္ေလးက Microsoft ကထုတ္တဲ႕ Window ေတြကို Activate လုပ္ေပးႏိုင္ပါတယ္ဗ်ာ။ Window XP နဲ႕ Server 2008 ကအစ ေနာက္ဆံုး Window 8 နဲ႕ Server 2012 အထိ အားလံုးကို Activate လုပ္ေပးႏိုင္ပါတယ္ဗ်ာ။ Microsoft Office 2007 , 2010 , 2013 စတာေတြကိုလည္း Activate လုပ္ေပးႏိုင္ပါေသးတယ္ဗ်ာ။ အခု Activator ကိုအသံုးျပဳဖို႕အတြက္ NET Framework 4.0 or 4.5 ေတာ့ အနည္းဆံုးရွိထားရပါမယ္ဗ်ာ။ Version 3 နဲ႕ 3.5 နဲ႕ေတာ့မရပါဘူးေနာ္။ အေသးစိတ္ေလ့လာခ်င္  တယ္ဆိုရင္ေတာ့ ေအာက္မွာေရးေပးထားပါတယ္ဗ်ာ။


KMSAuto automatic KMS-activator for the operating systems Windows Vista, 7, Windows 8/Server 2012 and Office 2010/2013 VL wording. Works without installation, activation does not leave incriminating traces in the system, his file with the settings for a remove from the profile and allows you to easily change the PID. Based on Microsoft Toolkit 2.4.1 Stable from CODYQX4 (MDL). There is also a function of setting KMS-activator for everyday reactivation.
Additional information and features:
Why do you make Portable - After using Microsoft Toolkit CODYQX4 of the system are traces of his work, which you can easily calculate what you activated the system. I naturally did not like it so I decided to eliminate this disadvantage. How does KMSAuto Portable: you run BAT file, the program is installed, the activation and after activation of the module from the system completely removes all traces of the emulator. All. You are clean and not to blame the corporation.
Now for the PID. The system is still a trace of the emulator, it is a long number called PID CCM server. At present the CCM server PID generated by KMS key, with which it passed the activation server, and the emulator just PID dialed from the bulldozer. But while the system with PID are validated.
My advice to you is to make small changes in the PID, what would all of it was different, this will give you more assurance that later, when the MS ozvereet and will ban the left and to the right, not banned. Here PID of KMSAuto Portable :55041-00168-305-256211-03-1049-7600 .0000-0012013. I selected a group of numbers that can be slightly modified. Here, for example 0012013 - this means that the CCM server was activated on the first day of 2013. Can be assigned as follows: 0402013, it will be the beginning of February. In general, it is desirable to change the PID bit, that would be unique.

How to use:
Run as Administrator to file KMSAuto.exe
A) Run Activation - Run KMSAuto for one-time activation
I) Install AutoKMS - Set daily reactivation of
U) Uninstall AutoKMS - Disable daily reactivation of
L) Show License - printing messages on the license
G) Grab License - Copies PID computer is running on the emulator file pid_dli.txt
R) ReadMe - Output to the console this file
Q) Exit - exit with KMSAuto
Just KMSAuto.exe supports running from the command line switches:
/ A, / i, / u, / g - corresponding menu command
Example: KMSAuto.exe / a - Start KMSAuto for one-time activation and exit

System requirements:

Microsoft. NET Framework 4.0 or 4.5 (Not 3.5)
Microsoft Office 2010 or Later for Office Toolkit Support
Windows Vista or Later for Windows Toolkit Support.


Window 7 ISO ( 2.74MB)


ညီေလး လျပည့္အတြက္ေပါ့ ၾကာေတာ့ၾကာျပီး ဒါေပမဲ့ အဖိုးတန္ေလးေပါ့
အေၾကာင္းအမ်ဳိးမ်ဳိးေၾကာင့္ iso ဖိုင္ဆိုက္ၾကီးေတြ ေဒါင္းဖို ့ခက္ခဲေနသူမ်ားအတြက္ေတာ့
အေကာင္းဆံုးေပါ့ေနာ္ ျမန္မာျပည္ က သူေတြအတြက္လဲ အဆင္ေျပတယ္
ဖိုင္ေလး ကို ေဒါင္းျပီး ျဖည္ထုတ္လိုက္ရင္ 4G ေက်ာ္ထြက္လာမယ္ အဲဒါေလးကို
iso ဘမ္းတဲ့ေဆာ့၀ဲလ္ သံုးျပီး dvd ထဲထည့္ဘမ္းျပီး အသံုးျပဳလို့ရပါျပီး ဗ်ာ
အဆင္ေျပမယ္လုိ့ေမွ်ာ္လင့္ပါတယ္ အားေပးမႈကိုအထူးေက်းဇူးတင္ပါတယ္
ေဒါင္းရန္ ... ဒီမွာ ဆိုတာ တစ္ခု ဒီမွာ တခု ဒီမွာ  ၾကိဳက္ရာ၀င္ေဒါင္းႏူိင္ပါသည္
  
မူရင္းလင့္

fb မွာ like ေပးျခင္းျဖင့္အားေပးပါလို႔ေတာင္းဆိုလိုက္ပါရေစ

Windows 8 မွာျမန္မာေဖာင့္ အဆင္မေျပသူမ်ားအတြက္

ကၽြန္ေတာ္တို႔ အခုေနာက္ပိုင္း Windwos 8 Preview Version ထြက္လာျပီးေနာက္ပိုင္း အမ်ားစု Windows 8 ကို စမ္းျပီး အသံုးျပဳလာတာ ေတြ႕ရပါတယ္.. ဒီေနရာမွာ ဘာေတြ ျပသနာၾကံဳ ေနရလဲဆိုေတာ့ အခုအသစ္ ထြက္လာတဲ့ Windows 8 မွာ Myanmar text ဆိုျပီးေတာ့ Unicode ကို Support လုပ္ေပးထားပါတယ္ .. အဲ့ဒီအတြက္ ကၽြန္ေတာ္တို႔ အေနနဲ႔ Unicode ကိုပဲအသံုးျပဳေနတယ္ ဆိုရင္ေတာ့ ျပသနာမရွိပါဘူး .. ဒါေပမယ့္ အမ်ားစုက ေဇာ္ဂ်ီ၀မ္း ကိုသာ အသံုးျပဳေနတဲ့ အခ်ိန္မွာ Folder Rename ကို Zawgyi-One နဲ႔ေပးထားလို႔ Windows 8 မွာ ေဖာင့္ေတြ ေျပာင္းျပန္ေတြ ေပၚေနတာေတြ G-Talk ေျပာတဲ့ အခါမွာ ျမန္မာလို ေပၚေပမယ့္ ေဖာင့္ေတြက တစ္လြဲေတြ ျဖစ္ေနတာကို ကၽြန္ေတာ္ Keymagic သံုးျပီး ေျဖရွင္းလို႔ ရမယ့္နည္းလမ္းေလးကို ေရးေပးသြားပါမယ္.

ကၽြန္ေတာ္တို႔ Keymagic ကိုသံုးေနတဲ့ သူေတြအတြက္က ျပသနာမရွိေပမယ့္ မသံုးဘူးေသးတဲ့ သူေတြအတြက္ နည္းနည္း အခက္အခဲ ရွိႏုိင္တာမို႔လို႔ ကၽြန္ေတာ္ Keymagic အသံုးျပဳနည္းေလးကိုပါ ေရးေပးပါမယ္ .. ဘာမွေတာ့ မခက္ပါဘူး .. အရင္ဆံုး Windows 8 မွာ Keymagic အလုပ္လုပ္ဖို႔အတြက္ Microsoft Visual C++ 2008 Redistributable Package ကိုအရင္ Install လုပ္ေပးဖို႔ လိုအပ္ပါတယ္ ..
32 Bits Users ေတြကေတာ့ ဒီေအာက္ကလင့္မွာေဒါင္းေလာ့သြားခ်လိုက္ပါ..

64 Bits Users ေတြကေတာ့ ဒီေအာက္ကလင့္မွာ ေဒါင္းေလာ့သြားခ်လိုက္ပါ..
Keymagic ကိုေတာ့ ဒီေအာက္ကလင့္မွာ ေဒါင္းေလာ့ခ်လိုက္ပါ..
အားလံုးေဒါင္းေလာ့ခ်ျပီးရင္ Microsoft က ေဒါင္းေလာ့ခ်ထားတဲ့ Package ေလးကို အရင္ Install လုပ္လိုက္ပါ .. ျပီးမွ Keymagic ကို Install လုပ္ေပးလိုက္ပါ .. ဒါဆိုရင္ အဆင္ေျပသြားပါလိမ့္မယ္.. ကၽြန္ေတာ္ တစ္ခ်က္ေျပာဖို႔ က်န္ခဲ့တာက Zawgyi-One ေဖာင့္ကို Install လုပ္မယ္ဆိုရင္လည္း အရင္ Windows 7 မွာတုန္းက အတိုင္းပါပဲ ဘာမွမထူးပါဘူး .. Install လုပ္ေပးလိုက္ပါ ..

ဒါဆိုရင္ ကၽြန္ေတာ္တို႔ ကြန္ပ်ဴတာမွာ Myanmar Text ေရာ Zawgyi-One ႏွစ္မ်ိဳးလံုး အသံုးျပဳလို႔ ရသြားပါျပီ .. Keymagic ကို အသံုးျပဳရတာ လြယ္ပါတယ္ .. ကၽြန္ေတာ္တို႔က Zawgyi-One ကိုအသံုးျပဳမယ္ ဆိုရင္ အရင္ Windows 7 က အတိုင္းအသံုးျပဳယံုပါပဲ .. Keymagic နဲ႔ Unicode Font ကိုေျပာင္းသံုးခ်င္တယ္ ဆိုရင္ေတာ့ Keyboard မွ Shift + Ctrl + Z ကိုႏွိပ္လိုက္ပါ .. ဒါဆိုရင္ ကၽြန္ေတာ္တို႔ က Keyboard မွ Zawgyi-One လက္ကြက္နဲ႔ ရိုက္ေနေပမယ့္လည္း စာလံုးေတြက Unicode ေဖာင္နဲ႔အလိုလိုေျပာင္း သြားပါလိမ့္မယ္ .. Convert လုပ္ေပးတာပါ .. ဒါဆိုရင္ေတာ့ လက္ကြက္အတြက္ အဆင္ေျပသြား ျပီလို႔ထင္ပါတယ္ ..
ကၽြန္ေတာ္တို႔ ဖိုဒါေတြမွာ ျမန္မာလို Zawgyi-One ေဖာင္နဲ႔ မေပၚေတာ့ တာေတြအတြက္ အရင္ Windows 7 တုန္းကလို Font ကိုသြားခ်ိန္း ေပးလို႔မရပါဘူး .. အဲ့ဒီအတြက္ ကၽြန္ေတာ္တို႔ လုပ္ရမွာတစ္ခုက Zawgyi -One ေဖာင့္နဲ႔ Rename ေပးထားတာေတြကို Keymagic သံုးျပီး Myanmar Text နဲ႔ျပန္ျပီး rename ေပးမွသာ Folder ေတြမွာ ျမန္မာေဖာင့္ ေပၚေတာ့မွာ ျဖစ္ပါတယ္ ..

ေနာက္တစ္ခ်က္ကေတာ့ G-Talk သံုးတဲ့အခါမွာ Myanmar လိုေပၚေနေသာ္လည္း Font ေတြက ထံုးစံအတိုင္း တလြဲေတြေပၚေန ပါလိမ့္မယ္ .. အဲ့ဒီအတြက္ ကၽြန္ေတာ္တို႔က G-Talk က Setting ထဲမွာ Zawgyi-One ေဖာင့္ကိုသြားျပီး ေျပာင္းေပးလိုက္ရင္ အဆင္ေျပသြားပါလိမ့္မယ္ ..
အားလံုးပဲအဆင္ေျပၾကပါေစ
ေနမင္းေမာင္ blog မွ ျပန္လည္မွ်ေ၀သည္..။
ခုလိုအားေပးတဲ့အတြက္ အထူးေက်းဇဴးတင္ပါေၾကာင္း ေျပာၾကားပါရေစ..ဘေလာ့ခရီးသည္မွ နည္းပညာမ်ားအား မည္သူမဆို လြတ္လပ္စြာ ကူးယူသုံးစြဲနိဳင္ပါတယ္.. ကြ်န္ေတာ္ ပိုင္ဆိုင္ေသာေနရာေလးမ်ားအား ဆက္လက္ လည္ပါတ္လိုပါက ***************************************
ဘေလာ့ခရီးသည္သို႕ { ဒီမွာ } သြားလိုက္ပါ
လယ္တီေျမသားသို႕{ ဒီမွာ } သြားလိုက္ပါ
စာေပနန္းေတာ္သို႕{ ဒီမွာ } သြားလိုက္ပါ

Number1 စာလံုးထဲမွာ Photoshop ျဖင့္ အလံ(ဓါတ္ပံု) ထည့္နည္း

 
 ဒီလုပ္နည္းေလးက ဒီဇိုင္းတခုဖန္တီးတာနဲ႔ သြားတူပါတယ္.. Photoshop ပညာကို ကြ်မ္းက်င္စြာ တတ္ေျမာက္ထားရင္ မိမိတို႔ စိတ္ထဲရွိသလို ပံုေတြ၊ဒီဇိုင္းေတြကို မိမိတို႔ Idea နဲ႔ ဖန္တီးႏိုင္စြမ္း ရွိလာပါလိမ့္မယ္..။ ဒီေပၚကပံုေလးက ဒီပိုစ့္ကို ေရးေနရင္းနဲ႔မွ ေပၚလာတဲ့ Idea ေလးပါ.. ဒီလိုေလး ဖန္တီးျဖစ္လိမ့္မယ္လို႔ မစဥ္းစားခဲ့ပါဘူး.. က်ေနာ္တင္ေပးထားတဲ့ Photoshop ေလ့က်င့္ခန္းေလးေတြကို ဒီပိုစ့္အပါအဝင္ အားလံုးကို အလြတ္လုပ္ႏိုင္သြားျပီဆိုရင္ Photoshop ပညာကို က်ေနာ့္ေလာက္ နီးနီးတတ္ေျမာက္သြားပါျပီ.. မိမိတို႔ စိတ္တိုင္းက် ပံုေတြကို ဖန္တီးႏိုင္သြားပါျပီ.. ဒီလုပ္နည္းေလးကလည္း မခက္ပါဘူး.. ဒါေပမယ့္ မၾကာမၾကာျပန္ ေလ့က်င့္ေပးဖို႔ေတာ့ လိုပါတယ္.. မလုပ္တာၾကာရင္ ေမ့တတ္ပါတယ္..။ က်ေနာ့္ကိုယ္ေတြ႔ပါ..။ 
ဒီေလ့က်င့္ခန္းေလးကို Photoshop CS6 Portable နဲ႔ ဖန္တီးထားတာပါ.. Photoshop CS6 Portable လိုအပ္တဲ့သူမ်ား ဒီေနရာကေန ဝင္ယူႏိုင္ပါတယ္..။ အရင္တုန္းက ဗါးရွင္းအေဟာင္းေတြ ျဖစ္တဲ့ Photoshop 7.0 နဲ႔ပါ ဒီေလ့က်င့္ခန္းေလးကို ဖန္တီးလို႔ ရပါတယ္.. က်ေနာ္စမ္းၾကည့္ျပီးသားပါ..။ ဒီပိုစ့္နဲ႔အတူ အရင္တုန္းက တင္ေပးထားတဲ့ Photoshop ေလ့က်င့္ခန္းေလးေတြကိုပါ PDF ဖိုင္ေလးေတြနဲ႔ ျပန္ထုတ္ေပးလိုက္ပါတယ္..။ အားလံုးကို တစုတစည္းထဲ အင္တာနက္လိုင္း မရွိလည္းပဲ ေလ့က်င့္လို႔ အဆင္ေျပေအာင္လို႔ပါ.. ဒီစာအုပ္ေလးေတြ ဖတ္ႏိုင္ဖို႔ Foxit Reader ေလးကိုလည္း မရွိေသးတဲ့သူမ်ား ဒီလင့္ကေန ဝင္ယူလိုက္ပါ.. အားလံုးအဆင္သင့္ ျဖစ္ျပီဆိုရင္ေတာ့ ဒီေလ့က်င့္ခန္းေလးကို စပါျပီ..
 Photoshop CS6 ကိုဖြင့္ျပီး အလံပံုေလးတခုကို ယူပါတယ္.. အလံပံုကိုေတာ့ Google Image ကေန Flag လို႔ ရုိက္လိုက္ရင္ အမ်ားၾကီး ေပၚလာပါလိမ့္မယ္..။ ေအာက္ကပံုအတိုင္း File Open ကေန ပံုေလးတခုကို ယူပါတယ္.. (မိမိတို႔ရဲ႕ နာမည္ေတြ၊ ဓါတ္ပံုေတြကိုလည္း ဒီနည္းနဲ႔ပဲ လုပ္လို႔ ရပါတယ္.. အေပၚဆံုးပံုမွာ ျပထားတဲ့ က်ေနာ့္နာမည္ထဲမွာ အရုပ္ကေလးေတြ ေပၚေနေအာင္ ဒီနည္းနဲ႔ပဲ လုပ္ခဲ့တာပါ..)


ျပီးရင္ေတာ့ ေအာက္ကပံုအတိုင္း A ေနရာက Tool ေလးနဲ႔ နံပါတ္ 1 စာလံုးေလး စေရးလိုက္ပါ..။  စာလံုးေတြ ေရြးတဲ့ အခါမွာလည္း အျပားထူထူနဲ႔ အလံုးၾကီးၾကီး စာလံုးေတြ၊ ေဖါင့္ေတြကို ေရြးျပီး စာေရးပါ..။ ဒီပံုမွာေတာ့ အလြယ္တကူ ရွာေတြ႔တဲ့ ေဖါင့္နဲ႔ပဲ လုပ္ျပေပးထားပါတယ္..။ အလုပ္လုပ္ရ အဆင္ေျပေအာင္ D ေနရာက အတိုင္း အမဲေရာင္နဲ႔ စာေရးပါ.. ေရးျပီးရင္ ကီးဘုတ္က Ctrl+T နဲ႔ 1 စာလံုးကို ခ်ိန္ညွိပါ..


Tools ေဘာက္စ္ရဲ႕ အေပၚဆံုးက Move Tool ကို တခ်က္ကလစ္ျပီးမွ Ctrl+T ကိုတြဲႏွိပ္ပါ..


အေပၚပံုအတိုင္း စိတ္ၾကိဳက္ 1 ကို ေနရာခ်ျပီးရင္ ေအာက္ကပံုအတိုင္း  1, 2, 3 အစဥ္လို္က္ ႏွိပ္သြားလိုက္ပါ..


ေနာက္တဆင့္ကေတာ့ Select ကေန Color Range ကို ပံုမွာျပထားတဲ့ အတိုင္း ႏွိပ္ေပးလိုက္ပါ..။


 Color Range ေဘာက္စ္ေလးေပၚလာရင္ OK ေပးလိုက္ပါ..။


ဒါဆိုရင္ ေအာက္ကပံုအတိုင္း ျမင္ရပါလိမ့္မယ္.. ေလယာေဘာက္စ္ထဲက အလံပံုေလးရဲ႕ ေလယာမွ ေသာ့ပံုေလးကို ၂ခ်က္ေတာက္ျပီး ဖြင့္ပါ..


ေဘာက္စ္တခု ေပၚလာရင္ OK ေပးလိုက္ပါ..


အေပၚပံုမွာေတာ့ အလံပံုေလယာမွာ ေသာ့မရွိေတာ့ ပါဘူး.. ျပီးရင္ေတာ့ ေအာက္ပံုမွာ ျပထားတဲ့ အတိုင္း နံပါတ္ 1 ေလယာေရွ႕က မ်က္လံုးေလးကုိ တခ်က္ကလစ္ျပီး ပိတ္ထားလိုက္ပါ..


ေနာက္တဆင့္ အေနနဲ႔ Select >> Inverse ကို တခ်က္ အရင္ကလစ္ပါ.. ပံုရဲ႕ ေဘးေဘာင္ေတြမွာ စလက္ရွင္ဝင္လို႔ ၾကိဳးတန္းေလး ေျပးေနတာ ျမင္ရပါလိမ့္မယ္..။


Select Inverse ကိုပဲ ေနာက္တခါ ထပ္ႏွိပ္ပါ.. (အဲဒီေနရာကို ၂ခါႏွိပ္ေပးရပါမယ္..) ေနာက္တခါထပ္ႏွိပ္ ေပးျပီးရင္ေတာ့ အေပၚပံုမွာ ျမင္ေနရတဲ့ စလက္ရွင္ ဝင္ေနတဲ့ ၾကိဳးတန္းေလး ေအာက္ကပံုမွာ မရွိေတာ့ပါဘူး..။ ဒါဆိုရင္ ေနာက္တဆင့္သြားပါမယ္..။


ေအာက္ကပံုမွာ ေရးထားတဲ့ အတိုင္း ကီးဘုတ္မွ Ctrl+C ကိုႏွိပ္ျပီး Ctrl+V ကို ထပ္ႏွိပ္ပါ..။


ေလယာေဘာက္စ္ထဲမွာ ေလယာအသစ္တခု ေပၚလာပါျပီ.. ေအာက္ကပံုမွာပါ..


ကီးဘုတ္က မွ်ားေလးနဲ႔ ဒါမွမဟုတ္ ေမာက္စ္နဲ႔ ေဘးဘက္ကို ဆြဲၾကည့္လိုက္ရင္ေတာ့ ေအာက္ကပံုအတိုင္း နံပါတ္ 1 စာလံုးရဲ႕ အလံပံုေလး ရလာပါျပီ..


အဲဒါကို က်ေနာ္တို႔ ေရြးထုတ္ဖို႔ File >> New ကေန စာရြက္ အျဖဴတရြက္ အရင္ယူပါတယ္.. ေအာက္ကပံု.. 


စာရြက္တရြက္ ရလာပါျပီ.. Untitled-1 ေအာက္မွာ မွ်ားနီျပထားပါတယ္..


က်ေနာ္ လုပ္ထားျပီးသား နံပါတ္ 1 အလံပံုေလးကို ယူမွာျဖစ္တဲ့အတြက္ Untitle-1 ဘားတန္းေဘး ကပ္ရပ္က Flag1.jpg စာသားေနရာကို တခ်က္ကလစ္ပါတယ္.. ေအာက္ကအတိုင္း အလံပံုေလး ျပန္ျမင္ ရရင္ Move Tool ကို တခ်က္ကလစ္ျပီး နံပါတ္ 1 အလံပံုေလးကို မွ်ားနီေတြျပထားတဲ့ အတိုင္း ေမာက္စ္နဲ႔ ဆြဲယူျပီး Untitle-1 စာသားေနရာေပၚတင္ထားပါ.. ေမာက္စ္ကို လံုးဝမလႊတ္ပါနဲ႔.. ဖိထားပါ..


အေပၚပံုအတိုင္း ေမာက္စ္ကိုဖိထားရင္ ေပၚလာတဲ့ စာရြက္ျဖဴေပၚေရာက္တဲ့ အထိ ဆြဲယူလာျပီးမွ  ေမာက္စ္ကို လႊတ္လိုက္ပါ..။ ဒါဆိုရင္ ဟိုဘက္က နံပါတ္ 1 အလံပံုေလး ပါလာပါျပီ.. ေအာက္ကပံုအတိုင္း ျမင္ရပါလိမ့္မယ္..


ဒီပံုေလးရဲ႕ ေဘးမွာ ပါလာတဲ့ အမဲစက္ေတြကို ပံုမွာျပထားတဲ့ အတိုင္း Eraser Tool နဲ႔ တခ်က္ခ်င္းစီ ဖ်က္ပစ္လိုက္ပါ..။


အေပၚကပံုအတိုင္း ရလာပါျပီ.. ဒါေပမယ့္ မပီျပင္ေသးပါ.. ေဘးေဘာင္ အမဲေရာင္ေလး ထည့္ေပးဖို႔ လိုပါေသးတယ္.. ဒီေနရာမွာေတာ့ မိမိတိို႔ အဆင္ေျပမယ့္နည္းနဲ႔ ေဘးေဘာင္ေလးကို ထည့္ေပးလို႔ ရပါတယ္..။ က်ေနာ္ကေတာ့ က်ေနာ္ လုပ္ေနက် နည္းအတိုင္း ေအာက္က အဆင့္ေတြ အတိုင္း လုပ္ပါတယ္.. လိုအပ္တဲ့သူမ်ား ဆက္ၾကည့္ေပးပါ..
အေပၚကပံုကို ေရးတဲ့ Font နဲ႔ပဲ ဒီအဆင့္မွာ ပံုရဲ႕ေဘးမွာ ေနာက္ထပ္ 1 စာလံုး တလံုး ထပ္ေရးပါတယ္.. ေအာက္ကပံုေတြမွာ ဆက္ၾကည့္ပါ..


အေပၚပံုအတိုင္း တဆိုဒ္ထဲ ျဖစ္ေအာင္ ပံု၂ပံုကို ထပ္ျပီး ခ်ိန္ပါ.. ေနာက္ေရးတဲ့ စာလံုး အမဲက အရင္ ပံုထက္ နည္းနည္းေလး မသိမသာေလး ပိုၾကီးေပးလိုက္ပါ..။ ဒါဆိုရင္ ပံု၂ပံု ထပ္လို႔  အဆင္ေျပသြားပါျပီ.. ေအာက္ကပံုမွာ ျပထားတဲ့ ေလယာေနရာမွာ ၊ အလယ္က ေလယာကို အေပၚေလယာေပၚသို႔ ေမာက္စ္မွ်ားနဲ႔ ဖိျပီး ဆြဲတင္လုိက္ပါ.. ဒါဆိုရင္ ေအာက္က ဒုတိယပံု အတိုင္း ေလယာ ၂ခု အေပၚ၊ေအာက္ ေျပာင္းျပန္ျဖစ္သြားတာကို ျမင္ရပါလိမ့္မယ္..


ျပီးရင္ေတာ့ Move Tool ကို တခ်က္ကလစ္ျပီး ေအာက္မွာျမင္ေနရတဲ့ အတိုင္း ပံု၂ခုကို ထပ္လိုက္ပါ.. ပံု၂ခုကို ထပ္တဲ့အခါမွာ လိုအပ္ရင္.. ပိုေနတဲ့ ေဘးသားေတြ ရွိခဲ့ရင္.. Eraser Tool နဲ႔ ေျဖးေျဖးခ်င္း တခ်က္ခ်င္း ပိုေနတဲ့ ၾကည့္လို႔ မလွတဲ့ ေနရာေတြကို ပြတ္ျပီး ဖ်က္ေပးလိုက္ပါ.. စိတ္တိုင္းက်ျဖစ္ရင္ ေလယာေတြ ေပါင္းပါ..


အေပၚပံုအတိုင္း ျဖစ္သြားလို႔ မိမိတို႔ စိတ္တိုင္းက် ပံု၂ခုကို ခ်ိန္ညွိျပီးရင္ အဲ့ဒီပံုကို သိမ္းဖို႔ အရင္ဆံုး ေလယာေတြကို ေပါင္းေပးလိုက္ပါ.. ကီးဘုတ္မွ Ctrl+Shift+E နဲ႔ ေလာယာေတြ အားလံုးကို ေပါင္းေပးလိုက္ပါ.. ဒါဆိုရင္ ေအာက္ကပံုအတိုင္း ေလယာေတြကို ေပါင္းထားျပီးသား ျမင္ရပါျပီ..

ပံုကိုသိမ္းတဲ့ အခါမွာေတာ့ အရင္တုန္းက Photoshop ေလ့က်င့္ခန္းေလးေတြမွာ ပါတဲ့ သိမ္းတဲ့ နည္းနဲ႔ အတူတူပါပဲ..။ File >> Save as >> Desktop >> Name >> JPEG >> Save ေပးလိုက္ရင္ မိမိတို႔ ဖန္တီးလိုက္တဲ့ ပံုေလးကို Desktop မွာ ရရွိပါျပီ..။

ဒီေလ့က်င့္ခန္းေလး ဒီမွာတင္ ျပီးဆံုးသြားပါျပီ.. အားလံုးပဲ လုပ္တတ္ကိုင္တတ္၍ အဆင္ေျပေပ်ာ္ရႊင္ ႏိုင္ၾကပါေစဗ်ာ..
ဒီပိုစ့္နဲ႔ အတူ အရင္ေလ့က်င့္ခန္းေလးေတြကိုပါ PDF ဖိုင္နဲ႔ ထုတ္ေပးလိုက္ပါတယ္.. လိုအပ္တဲ့သူမ်ား ေအာက္ကလင့္ကေန ေဒါင္းယူထားလိုက္ပါဗ်ာ..
Mediafire

ဒီဖိုင္ေလးေတြ ၾကာၾကာခံေအာင္ adfly စာမ်က္ႏွာေလး ၾကားမွာ ထည့္ေပးထားပါတယ္..

မူရင္းလင့္